Off Grid with Doug and Stacy, “Loading the first log ever on the Hud-Son Forest Equipment Warrior portable sawmill and it ain’t pretty”.
That’s why I’m going to get a John Deere 333E because these Bobcat’s just aren’t good at picking up these heavy loads. They don’t have a good tip. You know braiding, right? So it can’t lift as much. I’ve seen the 333 from John Deere lift some stuff. The Bobcat comes in behind ii. Try’s to lift the same thing and it can’t. It starts tipping. So that’s why we’re going with the John Deere when we get this skid steer stuff figured out. I just wanted to show you guys that with these heavy loads. The Bobcat’s a good machine but it’s just not made for the meat man! That’s a 5 series, I’ve even looked at the 650’s, and even the 750’s the bigger ones and John Deere still out performs them, so. So that’s what I got for you right now. I got to stay busy.
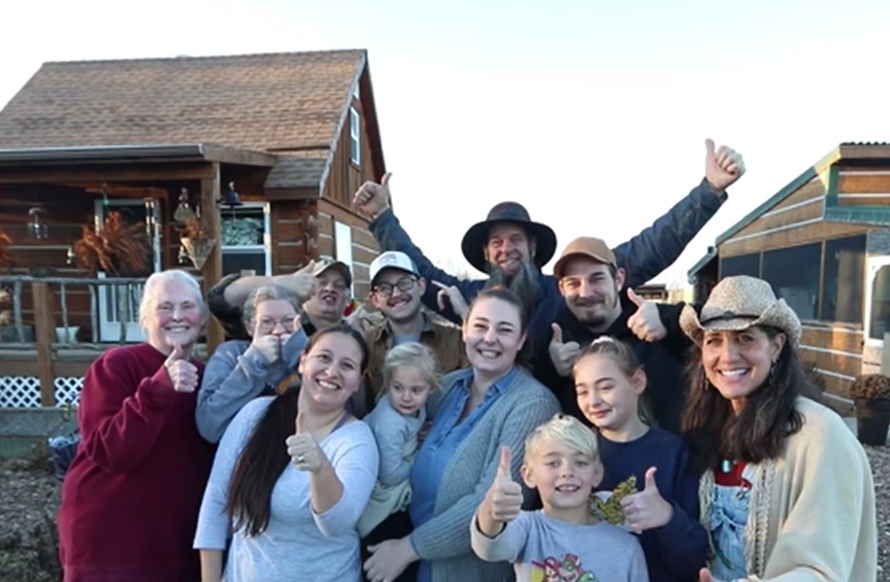
Real quick we’ve got four generations here on the family farm. This is our first family farm so its really a big deal. While were all here were going to chip in and get this whole wood lot area cleaned up, starting with this big mess right here. As you can see I kind of let things lay about after we put the concrete on the big barn and now were going to get all this cleaned up/get the woodlot more organized.
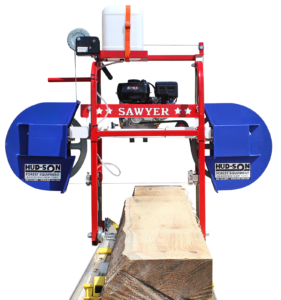
(Hud-Son Forest Equipment Freedom line portable sawmill)
I hope the rock guy does an awesome job spreading that rock out so bam on that! Chickens can’t wait to b perma-culture chickens so don’t ever hold them back! There always up here working on the multch pile along with(who is that, Molly?) Hey, don’t you chase those chickens now! She’s doing really good on her farm training.
You have to remember that I could have edited it out or all of a sudden the log is on the sawmill but it takes practice to learn this stuff. I’ve never loaded a log onto a sawmill. That was the first time ever so I’m kind of like scrambling about but give me a couple times. Working with the equipment, figuring this stuff out.
Again, thanks for watching our videos! Got any questions about what’s going on this video or about the woodlot or anything else that you might have because we do live off grid, in a log cabin with no public utilities, no solar power, no wind turbine, no electricity. We have a little generator to use on demand. That’s it!! We have lived out here for 10 years! So if you have a question about something like that drop it in the comment section below. We’ll see you guys next video. We’re having lots of fun in 2020 so don’t miss a single video! Hit the subscribe button, give me a thumbs up sign on the way out. We’ll see you tomorrow!!!
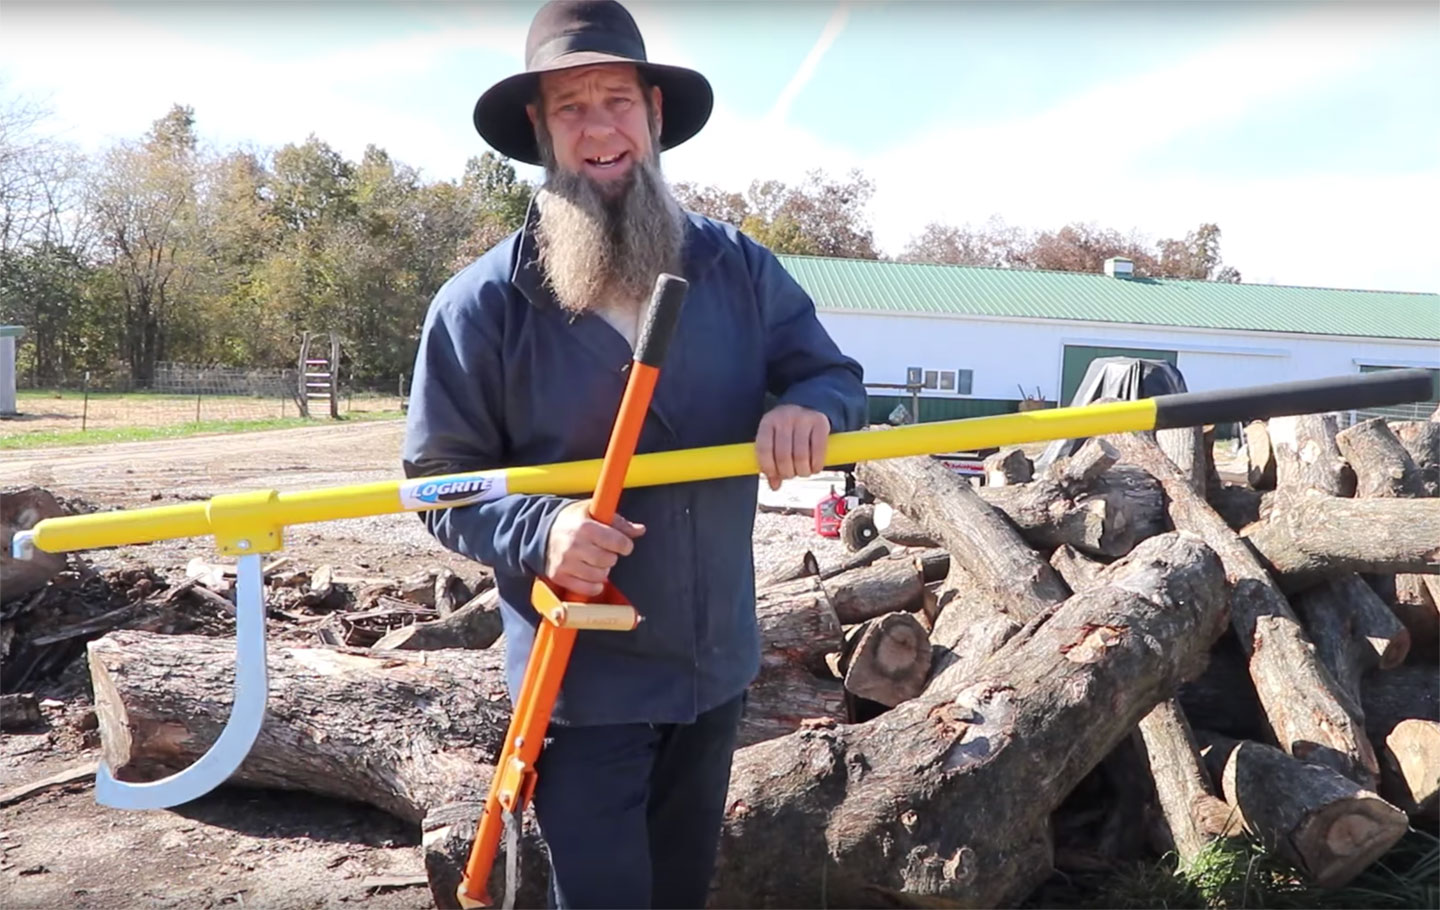
Alright, alright. Welcome back to the woodlot. Today we’re going to talk real quick about cant hooks.
Man, we have had several hard frosts already. We have even had a dusting of snow. So I normally switch over to my hat here. The beaver hat from the beaver hat company. During the winter time just in case your new here and never saw that before. I switch my hats and I’ll wear this all winter into early spring.
Real quick about cant hooks and the last video we did on snatching up that log. Appreciate you guys watching that video and also getting some ideas. Some ways that we can improve our situation. We are not professionals doing this yet and you have to start somewhere. A lot of you guys have been talking about cant hooks and all this stuff. Let me explain to you how all of this went down.
So basically it was this situation where we were getting it together to scale. While it has been happening we were figuring out how we were going to do it.
So the first step was getting the winch on the trailer because were going to need something to pull the logs onto the trailer. Than we thought of a steel plate on the ramp that would allow it to slide up the ramp and not let it get caught in those grooves on the way up. So that’s out first plan of attack. So when we did start that plan of the venture I did have a cant hook. It was this one right here. It’s my favorite go to of all cant hooks. It’s the LogOx. It’s a 3 in 1 forestry tool that I use around here all the time. It’s my exclusive go to the LogOx. I’m going to leave a link down there. It’s an affiliate link so if you get one of their bundles we make a few pennies off of it. Bottom line it’s a tool made in America and a family that we trust and love so this is my go to all the time.
Now this has a space limitation okay. This is a smaller cant hook and it can handle some pretty big logs. So that is all that I had at the time, right. Doing this kind of stuff is not cool around here where we live so to get a cant hook like this you can’t just run down to the hardware store or the farm/in home because what they have is what I used in the video if you caught that was a smaller cant hook about this size that didn’t work at all. That’s why I abandoned it right away. I already thought about using this but I knew those logs are too big.
The other thing we were running up against was time. That log had been laying there for a little bit and we went to get the log and than with the winch and the trailer we figured out that we would definitely need the arch. So than we had to leave. Get the arch on the trailer than we showed back up and pulled the bog log off.
So we were battling against a little bit of time. I don’t want these logs laying around too long. As a matter of fact just because this log had been sitting around too long some scavengers
had actually came into the yard and picked away some of the pieces for their own firewood. So actually what they had left was the big pieces that they could not maneuver themselves and a little bit of stumps and stuff that I picked up while we were there that you guys saw on that video.
So what I’ll do right now is I’ll take you guys up and show you the log that we brought home and I’ll put these two cant hooks on there and explain to you why we even have one.
Again I actually had to order this off the internet and have it delivered here because like I said around here because like I said places where I can just stop and buy a cant hook like this any old day of the week.
Alright here is the big log. Here’s the LogOx. Hold on just let me set this down while I get this thing off my shoulder. Now you can see your just not going to have the bite on this smaller one with the leverage that you need. That’s the benefit here with the longer one here with the wider grip because you want more leverage to actually dig in and than move the log. While truth be told neither one of these are going to be able to move this log. It’s just too big of a log. If I had several fellows trying to go at the same time I’d imagine but this is 7,000 pounds and I myself am not going to be able to do it so I’m just trying to give you an idea on the difference. If you get some bite on this you would be surprised what it will move. It’s got a good bite on it though.
So again were kind of learning this stuff as we go. So as we go were going to get better at this. So as you guys watch this you’ll be able to point out mistakes. Also learn from the mistakes that we do make. Right now were going to go back down there and get part two the neighbors tress. That’s a huge oak. Almost twice as big as this. We only got a 12 foot section and than maybe a couple of 10 foot sections. Than a lot of the arms, branches coming off of it so. Should be an interesting video so lets go see how we get it on the trailer.
So what I wanted to do for sure is I wanted to get the trailer out of the way so when Greg backs in he has a smooth way to go to this pile. I’m going to take you guys over to see the pile were going to pick up today and than I’ll show you these oaks were going to come back for. It’s going to take us several trips.
Now these are all LogOx size and these are the larger cant hook size. I mean look at that thing. No joke. I wear a 13. Ha ha ha ha ha ha!
So as you guys can see we’ve got out work cut out for us. So I explained to the homeowner that this is probably going to take us a few trips because we only have one trailer that can lift up these things. Actually those as well because together we cant just lift them up and buck them onto the trailer. A lot of times I can just buck them with another guy on there but we need heavy equipment for this whole tree. One of the things you need to think about if your going to do this type of stuff is getting them on and off the trailer once you secure them. I just want you guys to realize this as well. This tree you have gone to waste. This tree would have been taken to the tree yard than they would have burned it up and pushed it into a pile. So were actually going to salvage this tree and who knows what were going to create with it. It could be firewood to heat us thru the winter. It could be spoons and bowls that we carve and make out of that. It could be huge signs. It could be lumber for a log cabin. So just think about all the possibilities if you get into something like this. What you can do with this. Especially if you are a creative person.
Let’s see if Greg backs the trailer up as good as me. Ha ha ha ha ha!!!
Not too shabby!
Back there at the house I said all that just to say you kind of start with what you’ve got and thank you add to it as you go on. No one can show up at any site and just become a professional the first time they show up. It’s going to take mistakes. A little head banging to get it right. Reading your comments. That always helps too. Just saying you got to start somewhere. You get what you got. You go get some. Build it as you go.
It doesn’t look that much but the oak is so dense it really weighs a lot of weight. Were going to get this last log here than strap it all down.
Alright we are disconnected and we are ready for the next process of this trailer basically firewood. Some of the logs on here we’ll be able to mill a little bit but for the most part its firewood. One thing I want to stress to you guys on this video is that it’s not a one size fits all world out there. So don’t believe them if they tell you that it is. Every kid is different. Every person is different. What you want to do is accumulate tools on your homestead to make these chores go easier or on your off grid property. Cause a lot of this stuff is heavy and just not the average man is going to be able to handle it. You have to be able to have the tools the hydraulics, chains, a little bit of thinking power to manuevor thru these situations that you find yourself in.
So another successful load back on the homestead. We’ll be going back in a future video to pick up those other big logs that are sitting there. You saw how big they were. Molly just came to visit. Come here girl! Daddy’s home!! Yeah!! This is Molly. It’s our little puppy. We just got her a little while ago. She’s doing so good. She’s so fiesty and fun.
But all cant hooks, it’s not a one size fits all cant hook. You guys need to get out there, see what your going to be dealing with than get the tools appropriate for the situation. And than the more tools you have the better off you’ll be. Check the home stores, estate sales, garage sales, and craigslist. I had to order it on the internet because no one out here runs and buys big cant hooks like that. But if you guys are interested in a LogOx, a multi purpose tool and I use the heck out of it. The links down below. There is a coupon code so it saves you guys a few bucks.
Thanks as always for watching the video and we’ll be seeing you tomorrow once we put that sawmill together.
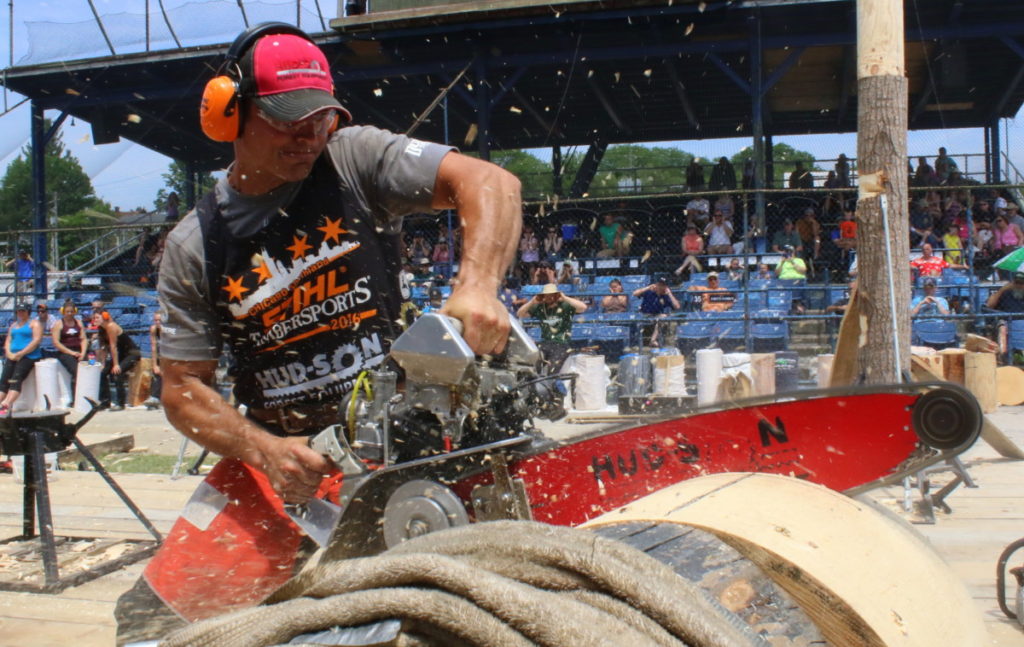
STIHL TIMBERSPORTS® – The Original Extreme Sport – features the nation’s best lumberjack sports athletes. Competitors go head-to-head using razor sharp axes and high-powered chainsaws in six thrilling disciplines: the hot saw, single buck, springboard chop, standing block chop, stock saw and underhand chop. STIHL TIMBERSPORTS® started in 1985 at regional U.S. logging competitions, and has grown to become a worldwide phenomenon with National Championships in 27 countries, culminating in the STIHL TIMBERSPORTS® World Championships (Individual and Team Relay). The sport now also includes Collegiate and Rookie Divisions, as well as a Women’s Division. The sport is sponsored in the U.S. by Duluth Trading Company and John Deere.
Fans can follow all of the sport’s heart-pounding action via social media by visiting Facebook, Twitter, Instagram, and YouTube.
Hey Dave,
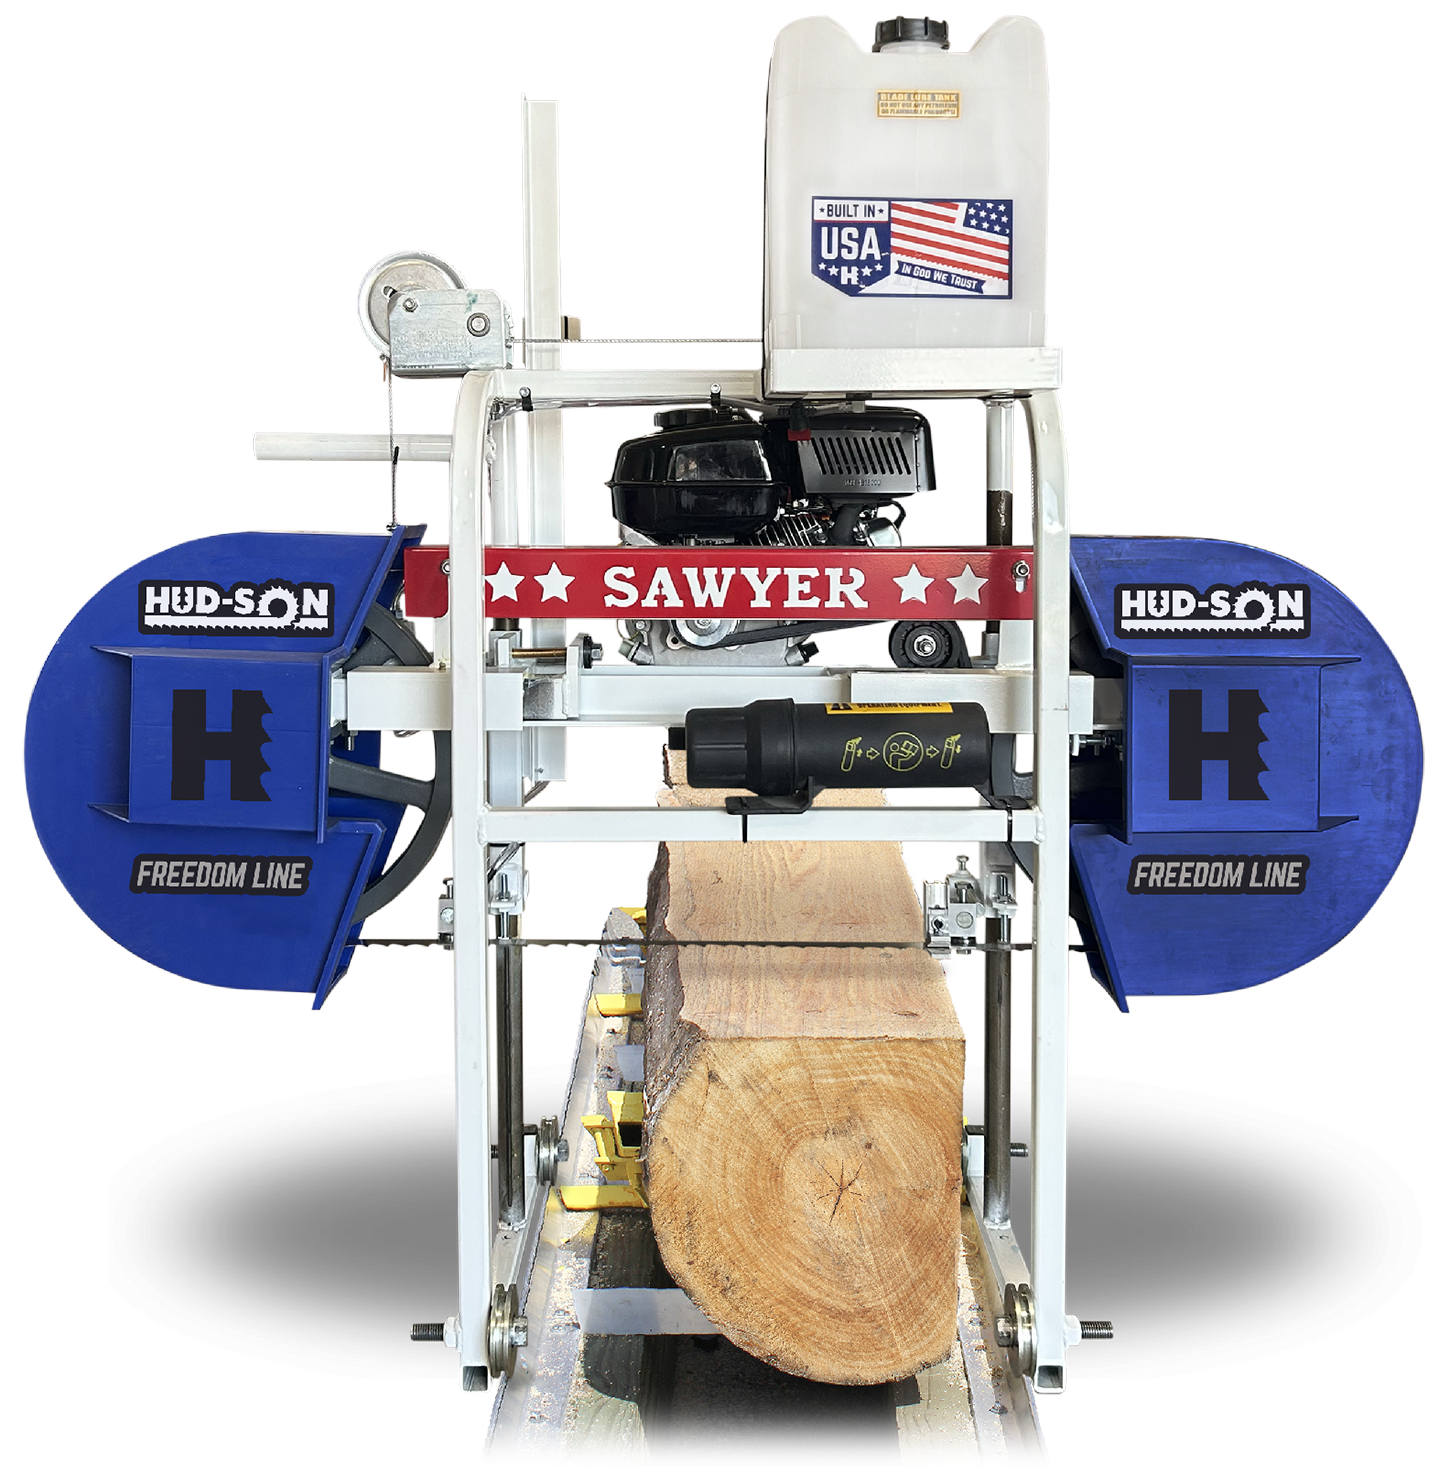
I wanted a sawmill that is made in America that was sturdy and up to the task at a reasonable price. The Hud-Son Sawyer looked right for me. On a whim I stopped by your showroom and spoke to a salesman. He answered all my questioned. I had a Ford Focus and he said it would fit. I said if it fits I’ll take it. It fit!
The Sawyer was easy to assemble. I enjoyed using only ASE wrenches. The unit started right up first pull. No adjustments needed.
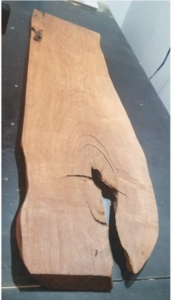
They said it would cut up to a 19 inch log. So I put it to the test and put in a 19″x24″x8 1/2 foot long. Using the “cheeters” the Sawyer took 5″ off the top. The log yielded 8 2″x19″x8 1/2 foot long Willow natural edge boards! Very little waste. Fantastic!
They said it could cut small logs so I tried a 4 foot 7″ diameter Osage, just for fun. I got several 1 in natural edge boards. For a further test in the middle I tried 1/4″ thick board to be used instead of plywood. Flawless! Hardly any saw marks. I took 3 boards all the same thickness with no problem. Once again very little waste.
The Sawyer is just full of surprises. It’s like panning for gold. You just never know what you’re going to uncover and just how much lumber you can get out of a log.
OGB(Off Grid Build)
How I operate a sawmill: Turning Tree’s into lumber(in depth)
Hud-Son Forest Equipment Farmboss 36″ Trailer Portable Sawmill
Alright, so right now I am milling lumber out of all the trees I cut down last year to clear the driveway and the build site of the property here. I’m milling all red oak right now into four square boards which is one inch thick boards. I’m milling enough of that until I get enough of that to use for flooring for the house. I’m not exactly sure how much flooring we need it’s going to be somewhere around a thousand to twelve hundred square feet not the whole house is going to be hardwood floors. Than I’m going to move on to thicker pieces for different pieces like six quarter, eight quarter, and ten quarter pieces for different pieces of furniture/trim/doors and things like that.
So this is my sawmill. It’s a Hud-Son Forest Equipment Farmboss 36″ Sawmill with heavy duty trailer. Theoretically, it can breakdown a log that is 36″ inch diameter cut the skins off all four sides and than you come down to a cant(a cant is a log that is squared on two or more sides that will be sawn further). The actual opening, the actual mouth that a blade can cut is 22 inches. So the idea is that you cut the skins off of 36 inch log and that you come down to a 22 inch cant. 22 inch width and height than you can cut boards out of that.
The biggest stuff that I’m cutting here is about 16 inches maybe 18 inch diameter. So not too big. So I’m going to take you thru the whole process. From selecting a log, cutting a log, to an appropriate length in anticipation of stacking it properly. Neatly and orderly. To deciding how you are going to make the cuts, depending on what you are planning to use the boards for. The size of the log will dictate that. How to stack it and dry it. The whole thing.
So I’m going to get started by selecting a log. So this is the bunt end of the log. It’s not too bad, there’s a little bit of checking I cut. Maybe six inches off the end. A lot better than the other end. That one is still pretty badly checked about six inches in. So I’m going to cut a little bit more off that end and I’m going to keep this like it is. I’m concerned about this right here because this is like another trunk of this tree that was growing separately next to the other one. At least it looks that way and than the whole tree kind of overcame it and it got encompassed. So that’s a little weird. I’d like to try to get rid of that too. Actually you can see right here there’s a bulge here so probably that trunk went out this way at some point and than it broke off/the tree just grew around it. That’s not going to be good for lumber. We’re going to be stuck with that but there’s still a lot of good lumber in this tree aside from that.
I cut six inches off the end but it’s still pretty badly checked(checked means the wood is dry and has cracked). I’m at 12 foot 6 now so I’m going to try cutting another six inches and see how much I can get out of that.
Still checked but it’s much better! Okay so this is my end sealer here. It’s actually called Anchorseal a company UC coating in Buffalo, New York. www.uccoating.com. They are pretty much the only ones who make good end sealer that I know of.
Just paint it on liberally on the end grain. You do not want to be skimpy on it. You want a thick, waxy coat. Now I was saying before that I should have done this when I cut the logs last year. Maybe I could have saved some of this checking from occurring. You know it’s not too late to do it now even though I’m going to mill the lumber. During the drying process, during the air drying process because this lumber is going to sit outside for at least a year here on the property and during that time even though now we have all these wood flat faces exposed that you can dry off those faces. It still lots of times check from the end grains. This is going to stop additional checking from happening during the drying process of the lumber. So we are going to get both sides here.
So I’m about to roll the log onto the machine here. A couple things 1. The dogs need to be up. These guys right here will stop that log where it needs to be.
As you can see this sawmill is on wheels, it can be towed. The bed is up high, about two feet here so you cant roll along onto it from the ground. You need to pick it up and drop it down. So this might not be the right mill for you if your just trying to roll logs onto your mill. For me I need to move it around and I’m really lucky to have a skid steer that I can use all the time. I’m just going to take the skid steer here up load that log off the forms and roll it right onto the bed of the mill. The dogs are up right now and that’s going to stop the log from rolling off the backside of the mill.
This is a really big log so I don’t want to risk slamming it on to the mill, so I’m going to roll it off by hand. It’s too heavy to move by hand so I’m going to use the cant hook to roll it.
Okay so orientation of the log on the mill. You can see here there’s a check going across this way and there’s another little check that meets this one halfway thru. This whole area is check free. In a lot of cases there will only be one check going across the diameter of the log. In that case when you start making your cuts you basically want to keep this line parrall with two sides and perpindular to the others. Once you get a square cant out of this. You want this going straight this way or straight that way. That’s going to allow you to isolate that check to one or two boards in the center of the log. Where all the other boards are check free. Which is really going to be hinderance to that. So if I make my cant exactly like this in this orientation which is how I’m going to do it, keeping this one as vertical as possible. I’m going to turn this thing so that this check is horizontal. So when I cut my boards off I’ll just capture that whole check is going to be running vertically and I’m going to get that check in every single board but basically for this half of the log. There’s really nothing I can do about this.
The other thing to consider is checks on the other side of the log. It’s nice when the check on the other side matches the same orientation on this side of the log because then that works on this side of the log because then that works great. You can capture the check on that side and the check on that side and the check on this side both of those checks in the center. If you have on the other side going this way than you pretty much don’t have another option you going to get checks. You can avoid all the checks going this way by turning it horizontal but on the other side your basically just trying to figure out what the best way to reach the checks on this side and that side. Somewhere your going to capture the check in as few boards as possible. It’s not rocket science.
So that’s one thing. This is a pretty good orientation here, right now. That check is running vertically , I like that. The other thing you need to consider is when orientating your log is what types of boards you want to get out of it. That’s going to require me to explain a little bit about the different cuts you can get out of a log. So(I don’t know if it’s going to show up at all). What I’m doing here is drawing a simulation of the grain. So those rings basically dictate the grain and what each board is going to look like and the structural properties of that. So basically there is a few different ways that you can solve this. If you do what is called plain sawing(the log is cut straight through with each cut parallel to the last). This produces a mix of plain, quarter, and rift sawn woods(about a third of each). Your basically just cutting a board here, cutting a board here and as you go down you cut boards like this. So what you end up with is different angles of grain in each board. This board up here basically the grain is pretty much flat, see that? You got the grain a little bit of curve but it’s pretty much flat running across that board. In this one, it’s like not quite at a 45 degree angle, it’s a little bit less than that so the one that is running flat we call flat sawn(boards have the grain running parallel with the wide face of the board. This creates a unique look as the saw effectively slices the annual growth rings right down the middle, giving what is know as a cathedral window look. When the grain is running vertically, vertical grain like you see here running a 45 degree angle or more, that’s more vertical grain and your not going to see those cathedral shapes. You’re going to see straight grain lines.
So the straighter the grain lines like here for example when the grain is running straight up like this, that’s called quarter sawn(lumber is defined as wood where the annular growth rings intersect the face of the board at a 60 to 90 degree angle. Quarter sawn wood has an amazing straight grain pattern that lends itself to design. Structurely that’s stronger than flat sawn or what this is call rift sawn(the annual rings are typically between 30 to 60 degrees being optimum. The log’s growth rings product a linear grain pattern with no flecking. Structural it’s the strongest and aesthetically it looks a lot different because you see straight lines.
I happen to like quarter sawn and rift sawn a lot better than flat sawn but it’s totally your preference. A lot of furniture it doesn’t really matter structurally you’re not supporting so much weight where it really matters if it’s quarter, rift, or flat sawn. It’s mostly than aestheic thing. There are some times for table legs for example. A lot of people like rift sawn for the aesthetic but also for the strength it gives. When your talking about structural members like load bearing beams, quarter sawn would be the best because it’s the strongest. Put that vertical grain up there and it can withstand a lot more vertical force than if you had a beam which were all flat saw. You know most beams the most 6 by 6’s or 8 by 8’s, 12 by 12’s basically they are the entire log. So when you have that much mass you don’t necessarily have to worry about having quarter sawn material. You’ve got quarter sawn but you’re also got rift and flat. You’ve got the whole thing. It’s strong enough with all that mass.
What I’m going to be doing, I’m going to be cutting out a cant. Which looks like this. So basically I’m going to be cutting out a square. I’m going to cut all these skins off. So what I get is what they call a square cant. From that I’m going to cut my boards.
So actually let’s move to the other end and I can redraw how I’m going to saw this log.
They way I’ve been sawing these logs most of my logs have been smaller than this. This is one of the bigger ones. What I have been doing is cutting off the skin like this give or take so this disappears to a flatten lined. So I’m going to turn the log 90 degrees and than this guy will be facing up to cut this skin off and so on. So what I end up with is the cant. From that, like I said most of my logs at least 12 inches. I’m dealing with a lot of cants that are between 7 to 10 inches. So in those cases I can really break it down and get different cuts out of it. This is basically plain sawn which looks like this. So I’m going to cut boards a matter of cutting four quarters to inch thick boards. I’ll cut one board here than the next board down here.
So what I end up getting is a variety of different cut boards. The first couple boards are flat sawn with the grain going more flat. The next couple are going to be rift with the grain going between 30-45 degrees like this. Than when I get around the center of the log it’s all quarter sawn. So it’s a mix of different cuts I get out of the log. When the log is much smaller. Smaller so I honestly get a few flat/rift sawn boards. The rest are all flat/rift sawn again.
So that’s how I’m going to do it. I might keep these boards the full width 12 inches than bream them down later in the shop when they are dry. If I do get 12 inches or more out of it I may turn them down 90 degrees and than cut them down to six inches of width. If there wide enough and worth cutting down I will. So I’m going to start up the mill and make my first cut.
To start off with, I need to lower these dogs a bit. I’ve got a handle to do it on the other side, just showing you here. You want to lower them to about here so I don’t have any chance of hitting these mental blades against the dog. It will ruin the blade. So I just want to keep them a little how. I’m going to lock it in at that height. Now I can roll this log against them so they stand still and there low enough so that there is no danger.
Alright, I’m going to use the cant hook here to roll this thing against the dogs. Now I’m going to use this little guy is like another dog, a different type of dog mechanical. It’s got a little spike. I’m hammering it into the wood. Now it’s not going to roll on me.
Give it a few more whacks. This is going to lever the log over and make solid contact with those dogs. Now this log is secure and ready for milling.
Alright, so this thing has a winch so I’m going to bring the blade down to right about I want to cut with it.
So what I’m doing here is sighting this blade against the length of this log. Now it gets wider at the other end and what I’m trying to maximize how much material I get out of this log. If this log had a pretty consistant diameter across the entire length, I’d bring it down to about here to make my first cut for the cant so I can get it square. I don’t want to go too far because this is all good material here. You can see how I can imagine a square of the fact it get’s wider at the end. I’m going to have to average it all out and see how that all works out.
I’m going to start this cut really skinny on this side and wider on the other.
So this is just a small 23HP motor. It’s a 23HP Briggs and Stratton. It starts like any other small engine motor would. It’s starts like any other small engine motor would. It’s got a choke but it’s warm so I don’t even need it. I’m going to start it up. Making sure that this guy is wide enough to cut inside our log. Next little thing here there is a little valve here to feed water to the blade to keep the blade cool. It is not it’s going to get too hot on a day like this when it’s rainy/cold but it also helps clean the teeth off as you cut.
Turn this valve all the way till you see the water come out on the blade than were going to pull it back until you see a nice, steady stream. It’s kind of like a trickle stream. Donesn’t need to be too much especially on a day like today.
Going to give it some gas too make the first cut. Okay, so where I want my square to be on this side my cut is a little narrow. I really want it to be out to here. It’s like I said because the side is a little wider I need to average. Make this side a little narrorer and make the other side a little wider. So we will take a look at the other side.
Okay so on this side we’re really wide because we cut deeper into the wider section of the log. So like I said a little narrow on that side and wider on this side gives us a good average. On this wide we’re probably only going to come out to like here for our cant.
Next up is to spin the log. Pull out this dog here. Put those dogs out all the way. Gives me the ability now to spin this thing against those dogs. Alright so using the cant hook I’m going to grab it and I’m going to grab it and I’m going to grab it and I’m going to turn it 90 degrees so that flat face is against those dogs. Now I’m going to put this little dog in. I’m going to grab it and I’m going to turn it 90 degrees so that flat face is against those dogs. Now I’m going to get the dogs down about half height before I do anything else because you want that in place before you put pressure against them. Okay so those are half height. It’s easier to do with two people for big logs like this. I’m going to put pressure against those dogs.
Alright now were ready to pull our power heat back and get ready to make our second cut. Okay for now once we make our 90 degree cut here now with a nice straight sharp edge. Now we don’t need these dog’s anymore on the back. We also don’t need the dogs that clamp in on the other side because we have these little tiny dogs. Now we have this right angle the weight of this just sits down and cant get pushed this way because of these little nubs that are along the length. They don’t have to have contact everywhere. See I have a little curvature of the log over there but there making contact in enough places to hold the log where it’s at. So now were just using these. I can make the last two skin cuts.
Alright there it is. All four skin cuts are off and we have an almost square cant. This was a bit challenging with me just by myself because it was such a big log. To hold it up against the dogs, get the other dogs in to hold it still. It’s pretty good. It will work really good none the less and we have 113/4 by 12 inch. So we’ll just wait till the morning and cut the boards out of it.
Alright so it’s the next morning now and were ready to make boards out of this cant. So first thing were going to do here is position the blade. I’ll show you how to do that so put this up to the cant. First thing I’m going to do is low the blade with the winch until it hits the tip of the cant so it’s just grazing. See how its bending the blade a little bit? That’s too far. You want it so its just grazing. Just graze that sawdust off the top of the cant without being the blade at all.
Okay now so this is out measuring gauge. It’s basically just a ruler and I’m using from zero to 36 inches. I’m just using that to gauge how high, how thick of a cut I’m making. You can also use this gauge over here. This 4 stands for 4 quarter. So a quarter is a quarter of an inch. So when your talking about an inch thick board. If your talking about inch and a quarter. Six quarter inch and a half 10 quarter two and a half. So this little gauge here the most common cuts for hardwood lumber are 4 quarter, 5 quarter, 6 quarter, and 8 quarter. So that’s why this little gauge has this here so you can just use it instead of trying to remember what number inch your at. You can go to one from one 4 to the next 4. I’m not too fond of doing that because what ends up happening is you end up needing to get off that gauge because the blade itself is 1/16th of an inch. Takes off a 1/16th of an inch kerf. So each time you make a cut if you just do 4 to 4 to 4 you end up losing a 32 second to a 16th of an inch you end up having to go a little lower next time. So I just like to go by the inches.
Now that we’ve lined up to the top of the cant you’ve got to look straight overhead. The way I do it, this is probably not even the original marking gauge. It probably was something else originally. I just reference off the bottom off this piece of plastic glass so I can get up, look at it nice/square and I can see right now we are at 12 3/4’s right there. So what I’m going to do for our first cut. I’ll lower this thing down to 11 3 quarters.
Okay so know I’m at 11 3 quarters and as you can see the blade is going to it and cut pretty much an inch board off the top of this cant. Another thing to note here is now that we have a cant that has a specific width can move this thing guy(this little support gauge thing) over closer to the cant. What this does is it supports the blade so that there’s less deflection so that the blade will have less change to bow one way or the other when your cutting thru the log.
Okay so I’m going to start it up and make the first cut. Okay so instead of pushing the machine away, pulling the board off and than pushing the machine back to make another cut, leave the boards on. The thin blade can just slice thru more and more boards even with the weight on top so we don’t need to take the boards off. You just keep cutting and cutting.
So when I picked the winch up a little bit to clear the board when I pull the machine back I than lower it back down to where I started to 11 3 quarter inches. I’m going to lower again to 10 3 quarter inches.
Okay so now that I’ve got a few boards cut you can see what I’ve been talking about here about capturing the pifth in a board or two. So we actually have about five boards that are check free. These are good quality boards. This check here that goes all the way across just underneath this top board here had been oriented vertically every single one of these boards would have had a crack in it going in X number of inches however far the check went sometimes it’s a couple inches. Sometimes its a couple feet. So now I’ve got there’s a little bit of that verical check that I wasn’t able to avoid. This piece right here has it but it was only one. Now on the next cut will capture pretty much that entire cut. So let me come back here. So I’m going to do down to 5 5/8ths. So now you can see that next board is going to take 90% if the board here.
I’d like to take a minute to tell you about my Hud-Son Sawyer sawmill. I picked it up, probably been about six months now. I’ve used it quite a bit. I felt like I’d give it a little justice and tell a little about it. I picked it up at a local co-op, they are a Hud-Son dealer. I talked to them about different mills they offer. I kind of had a price point in mind about 2,000 dollars. This one was a little bit more than that so that worked out pretty well as far as price. So far I’ve been pretty satisfied with it. I really enjoy using it. It’s an experience because when you get it it’s in a big crate and fit in the back of my truck. I had to take it out piece by piece and you have to do all of them assembly. In doing that you get to know every part of the mill because you have to put it all together. This thing is constructed very heavy duty for what it is. The bearings and the shaft are very, very heavy duty. I think it’s an inch and a half shaft, bearings are huge and do a very good job. There is a six year warranty on that so their pretty confident in it. As far as the power it has a 7HP motor in it. It’s done a great job. We’ve had a 17 inch oak cant. One of my buddies cut up with a chainsaw mill and got it square, brought it over, and it cut thru it no problem. Blades are pretty reasonably priced. I buy mine from Timbery. I get a five pack, $12 a blade. They last a pretty good while.
I really enjoy using this mill. It’s productive, it’s been good. The only negatives I’ve had is the track is a little funny. With the aluminum and in three sections. I’ve had a little trouble with the joints, it likes to flex. With a little bit of modification I’ve got it nice and steady so that is good. Also with the loop system I’ve noticed that if you tighten the cap down really, really hard it creates a vaccum kind of like new gas cans that don’t have anyway to release the air so it doesn’t want to let water out. I fixed that by making a little hole and put a little rubber stopper in it. It seems to work fine. The log dogs do a pretty good job. At first you think, man these things are terrible because there coated pretty good with the yellow paint there but once you use them and get a little wear on them they start to slide easier. There actually pretty good to work with. They definately clamp down on the log and if you get in there good it’s not going to go anywhere. I added instead of the sticker they sent with it an aluminum ruler I got at Harbour Freight for 2 dollars. I put it on with zip ties and it seems to do the trick.
I would recommend this to anyone who likes to be outside. Who likes to do anything with wood at all because it’s something to do. There’s 60 acres out where I’m at and I’ve never run out of wood to cut either here or if other people have trees down.There’s always stacks of logs that I never seem to get to.
I’ve also included a video of cutting up a pine log I did earlier today making a pen for the horses. There’s always a project or two that you can get done. So hope you enjoy the video of milling. It’s a lot of work not necessarily something that is easy but it is rewarding. It gets you out, get’s you moving, and I do like that. You will want to have some sort of tractor or skid steer. Something to pick logs up because you would not want to be doing it by hang. That would not be fun. I’ve got a tractor so that helps out a lot. Overall I really enjoy it and hope this helps you if your thinking about buying one. It’s not something you’ll regret. If you use it, you’ll really enjoy it so, Thank you!
Nick Klaich “Successful loading and slabbing a 3,000 pound Elm tree-Urban Logging/Hud-Son sawmill”
Good morning, my name is Nick. Some of you might have watched my prior videos where I attempted to place a large Elm tree on my Hud-Son Warrior mill. I was unsuccessful but today we are going to get another tree and I have a new plan. Stay tuned.
Elm tree estimated at 3,000 pounds.
So in the clip here you’ll see me cutting what’s referred to as cookies in the wood working world. These are crosscut sections that can be used for tables or something like that. The maximum distance between the guides on my mill is 31 inches. This piece here that I’m cutting is 35 inches and this tree on my trailer is 12 feet in length. The max I can get on my mill is ten feet long so this is the way I can basically keep cutting these things off and than I get it the maxmium yield on the cookie pieces as well as keeping the long as long as I can for slabbing it out which we will see here in just a second.
I also wanted to take the time to give a shout out to my buddy, Mike, from Battle Born Tree Service in Carson City, Nevada. If your located in the Reno, Carson, or Lake Tahoe area, you should definatly check him out. He does great work and he’s a huge help to me giving me these large logs.
Okay without further audo, the big surprise on this video is how I’m going to get this tree on the mill. It’s actually removing the mill head. With all the ideas I had this seemed the easiest. I really didn’t do a great job prepping the palletjack here. You can see I put two little clamps but it got it off safely. In the future I have a better idea of how to get it attached. Overall I’m going to call it a success getting it safely out of the way so we can get the trailer back up here which you will see in the next video.
So here I’m just showing you the tree the strap goes to, it actually goes under the log deck and than comes out where it is chained around the tree. You’ll see me when I start to pull this off. I’m not too concerned at this flat end were looking at because those seem to land softly. It’s the other end I’m concerned about. If a 3,000 pound log just lands directly on the mill its basically going to bend it and completely throw it out of caliberation. What your going to see me do here is straighten it and then on the other end I’m going to set up some crimping which successfully catches that other half of that load. I know some people have suggested using pipe to get it on and off but here’s the problem. Once the tree is on the trailer I can’t lift it due to the design of the log arch. I really don’t want to put pipe under it while I’m traveling on the freeway because I don’t want to risk any of it coming off.
I think you’ll see here the successful catch of the load with crimping.
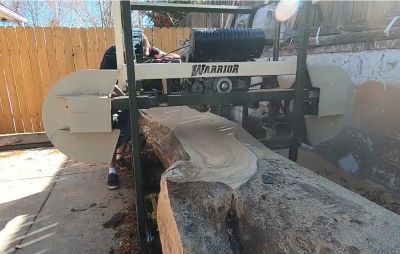
“Starts sawmill and start’s cutting with the Hud-Son Forest Equipment Warrior portable sawmill.
So you can see on the side of the log to the right that I shaved off some of the face of it with a carbide grinding disk. I didn’t do enough that’s why the mill is kind of catching here. If you don’t give enough space to have the sawdust inject out than it kind of bogs it down a little bit. So I pushed it thru which is probably not the right thing to do for the guides or the mill but the substant cuts that are not in this video I ended up taking that carbide grinding disk and giving it about three quarters of an inch on either side of the guide so that it preforms much better.
So some of you have not seen my last video. The product that I use to keep my slabs tied tight and straight is called Kubinec strapping. It’s a nelon basked material that has these buckles here that you thread thru and than you rachtet like this. You can get this really tight. Almost like a piano string. Some people were upset that it’s plastic product and that I will ruin the planet. The good thing is that it’s reusuable. You can tighten it with a side rachet or if you stack this up but if you were to break it or pull a slab out of here, you can easily re-loop this and use it again. So it has a lot of life left in it. You can see here how to tight it is and keeping everything in a line.
So on this other stack here you can see I did not use that Kubinec strapping on because I didn’t have it yet. Don’t look at these top three pieces, they don’t really count because they we’re cut with a chainsaw and the ladder moved on the deck. These ones down here you can see that if you don’t put the stickers in the right place where I didn’t and you don’t keep them tight, you get a lot of movement and vibrations on the end so I’m really happy with the new product and the new strapping. It’s definately keeping things tighter and cleaner.
So in the next clip here your going to see me successfully stack two of my log stacks and put them on top of each other. This is something that I’ve been thinking about in my mind on how I would do it and it would obviously expand the limited space I have in my driveway where I could store more material. Having a forklift would be ideal in this situation but I don’t have the money to buy one or to maintain one I’d buy(an older one) on Craigslist or Ebay. I’m pretty pleased here with a little injunity and a little bit of planning I was actually successful in getting them on there. I thought it was relavitly safe looking at the operation afterwards. So happy that this worked and I’m going to keep it going to decrease the footprint around my property.
Well we have arrived at the end of this video and I hope you’re enjoying watching it as much as I’ve enjoyed making it. Hopefully I have inspired one of you to possibly go out there and mill your own lumber or their woodworking projects because it is definately a blast. I enjoy doing it and these video’s allow me to share that journey with you. So please subscribe if you haven’t already done so and I hope you have a great day!
Off Grid with Doug and Stacy Game Changer! How to make money on the Homestead. A Hud-Son Warrior sawmill was part of this plan! Thank you Doug and Stacy for sharing videos with us.
A plan to make money on the Homestead with Doug and Stacy. Unboxing our first Hud-Son Warrior sawmill.
What an exciting day here at the homestead! I think one of the most asked questions we get here on our YouTube channel is how can we make money and live the lifestyle that you’re living. One thing I want to express to you guys is what your watching and what your seeing right now if your just tuning in or if you are a new subscriber to our channel is eight years of blood, sweat, and tears right now. None of this stuff happened overnight. We saved, we struggled, we hauled water. It took a lot of things to get us to this point.
That’s right Mr. Rooster!
So just remember that when you watch these don’t think that your going to show up at your homestead and things are going to happen overnight but you need a plan. A plan to make money on the homestead. And that’s one of our goals here with Stacy and myself. Showing you field trip Friday and talking to people that are doing this lifestyle. Giving you ideas of ways that you can make money so you can leave that job that you hate, out of the city that stresses you out, so you can breath fresh air, grow your own food, and connect with nature.
So one of the things that we try to focus on is how you guys an get out here and make money on the homestead and live this life. We’ve shown you guys a lavender farm. She turned her passion into a business. We’ve taken you to market gardens and introduced you to market gardeners who are making over six figures. Growing crops such as kale and spinach, carrots and beats. Stuff like that. We have taken you guys to many different places like the alpha’s farm where that guy was raising alpha’s and than sharing them. He makes products out of their fibers so lots of different ways that you guys can make money on the homestead. That’s why Stacy and I put out those video’s. It is to help motivate you and help you think outside of the box.
Just like today’s video where we are going to be talking about a sawmill and unboxing our first one here on the homestead. Then this can bring money to your homestead as well and its really not that complicated.
The one thing I can say about the sawmill so far is that they packaged it really well. They shipped it really good. Everything was strapped down with metal straps and actually this package has been sitting on the side of the barn for quite a while. I just put a tarp over it, a couple of them, and it just stayed dry. Everything is in tact, everything looks good. You guys did notice I actually hauled it over, over here to the pad with a chain on the top so that’s important because usually you get stuff shipped to you and they put it in crappy crafting so when you get it’s all dinged, scratched, busted, and messed up. So were off to a good start.
Okay guys were going to show you real quick a safety feature so you never saddle a dead end on a cable like this. Right so this is what you call a dead end and this part right here is the saddle. See this right here? Right here, let me show it to you so you can see that. The big end there not the arch but the fat end where it all clamps down, that’s what they call the saddle on the live wire not on your dead wire.
I’m going to show you guys how that looks. This is not just on this. It’s anytime you are stiching up a wire like this and your using these saddles. You want to make sure that you never saddle a dead end. That is your safety tip of the day. So this requires two so I’ll put another one on here right now. I’ll make sure that they are straight and make sure that they’re saddled properly.
Now were going to install the battery. Alright that’s all we got for you today. We got a lot of it assembled and had a couple other things we had to do around the homestead. So we had to break it apart and we will get back to you on the next video. We’re going to oil up the engine, get the gas in there, and than put it all together with the blade and the whole nine. Fire it up for you guys and show you what it’s like. Maybe grab one of these skinner pieces of logs just to kind of put it on there and see just how that thing cuts right thru like butter.
One thing I want to talk about real quick is the company. The Hudon family has been in the business since the 1940’s. There out of New York and their a family run business just like I was talking about earlier. Their passion was forestry and they created a business around their passion. Now they service all of North America freely with all these great sawmills and other forestry tools. As a matter of fact they were actually introduced to us by our friends at the LogOx, a family run business that were friends with here on the homestead. Which your going to see a lot of coming up because we got a lot of firewood video’s coming up and they really help us harvest our firewood with a simple, yet effective invention. They were able to turn their passion into an income as well.
So hopefully all of this is actually inspiring for you guys. The Hudon family adopted the name Hud-Son. What happened was that the son was involved with the business too and its just a really good story and we really like working with them so far.
The one thing about this mill that its called the Warrior sawmill and every time they sell a Warrior sawmill they’re actually donating money to the veterans. So that’s near and dear to our hearts. A lot of you guys have been with us a long time and know that were a military family. Our sons are in the military and we have a strong bond with service to our country and patriotism. So good job on you guys for that and were really looking forward to seeing the next stage of this Hud-Son sawmill the Warrior. I’m going to drop for you guys a clip right here about some bullet points and things Hud-Son put together for you guys can enjoy. Again look forward to more video’s to come and as soon as we get back from the Homesteaders of America conference where Hud-Son is a sponsor as well as LogOx. These people that are running family businesses as well that are investing back into the community guys. So if you guys have money to spend and your looking for ways to improve your homestead please consider all the people we talk about here on our channel because we are supporting and promoting family business and when we can do that everyone is a winner.
We would be remiss if we did not mention this full circle tear to your eye mesquite log story. This coming from our good friend and customer of Hud-Son sawmills in Cocoa, Florida CW Bailey:
Quote: “His story was enough to make even a crusty old sawmiller much more than a little misty.”
Hey CW,
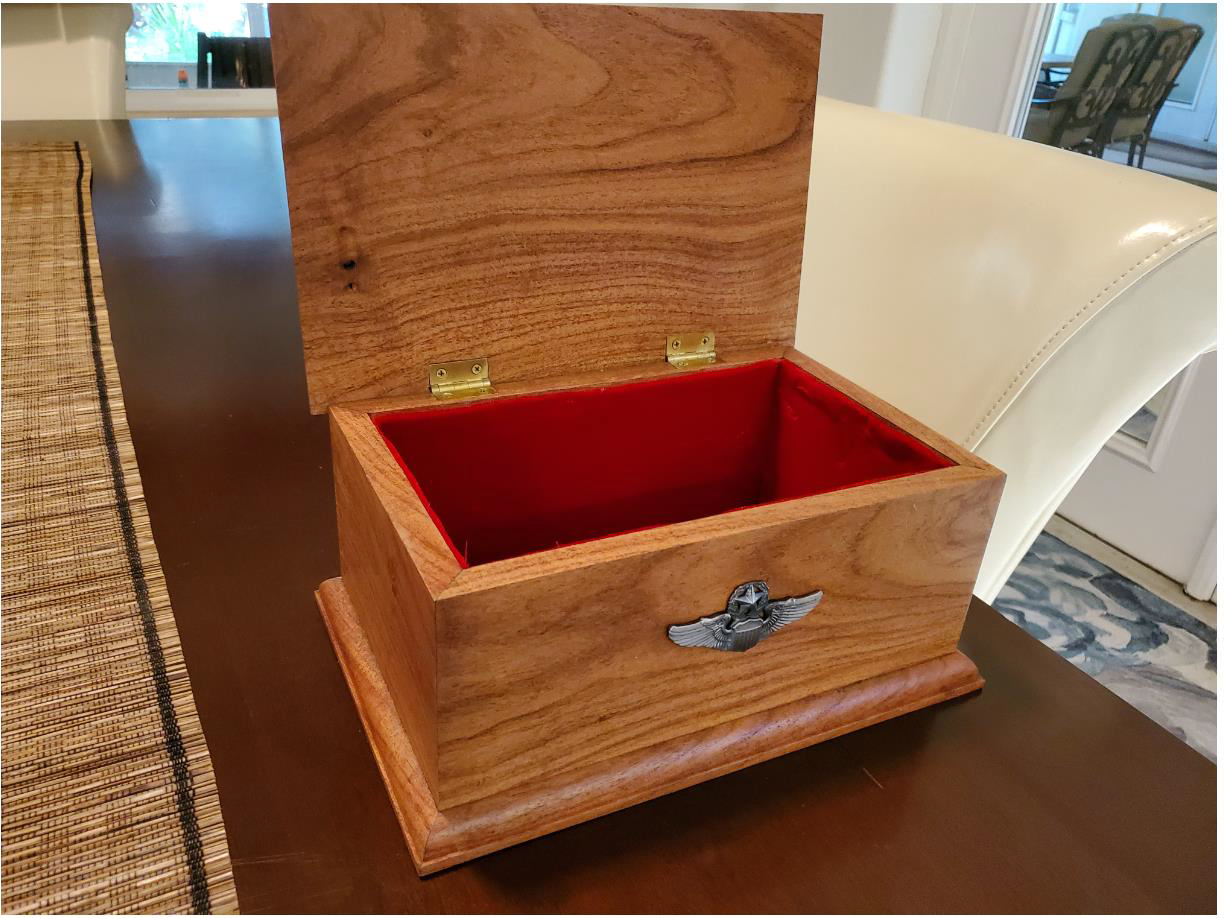
My wife and I were in your place last month. We bought a slab of mesquite so I could make a box. This is no ordinary box. You see, my father was a fighter pilot during the Vietnam war. In 1967 he was shot down and was listed as MIA. Well, earlier this year some very dedicated people were excavating the crash site and his remains were finally recovered and identified. The box I made from your wood will hold MIA bracelets with his name on them and other things people want to include.
Another great part of this story is that I flew in the Air Force too and ended up in the airlines. I will be flying my father home from Oakland CA to Dallas Love Field where I last saw him at age 5.
Great closing of the loop.
Just thought that you would find it interesting what happened to a piece of your wood…
What was once a pipe dream is now a reality with the help of the Hud-Son H360. Brian of Maxx Forestry (a Hud-Son Dealer) and his customer Matt of Colorado take the time to show us how they used the H360 to build a barn. Some of the timbers used in this build were from the Black Forest Wildfire. Thanks for sharing with us guys and we hope you enjoy there video.


 We would be remiss if we did not mention this full circle tear to your eye mesquite log story. This coming from our good friend and customer of Hud-Son sawmills in Cocoa, Florida CW Bailey:
